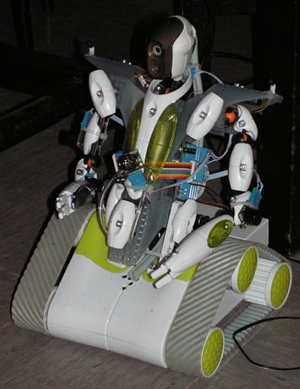
Spykee

Spykee is a commercial, low cost robot produced by Mecano, which can be driven remotely by computer. It has a camera on board which can send images via WI-FI to a computer. It can also issue messages and sounds via a loudspeaker. Antonio Micali has implemented in the RoboWII2.0 project a library to drive it directly from code and get information both from its original sensors and from a sonar belt he has mounted on the robot and connected wireless via XBee.
The robot home is the AIRLab in Lambrate (cupboard C-INF), and is to be used by people working on the ROBOWII and RobogameDesign projects. In the box there are: Spykee, Spykee charger, 2 wiimotes, a XBee module, RFID cards.
If you need to take it from there, you should first ask Andrea Bonarini, and then book it in the table below.
| Day | Time | Person | Project |
|---|---|---|---|
| for x days |
- As the Spykee firmware is open source, you can take a look here if you want to find out how the other packets work (beware: the download is huge!)
- Here is an incomplete and partial explanation of the communication protocol between SpyKee and the computer (not all packages have been tested... )
- Here is the firmware of the STM Board that manages the added sensors, in the box on the back of the robot. Please, ask Andrea Bonarini if you cannot access it.
Sostituzione batterie
Le batterie originali di Spykee con il passare del tempo non tenevano più la carica, quindi sono state sostituite. Le batterie originali avevano un amperaggio di ???A, sono state sostituite con delle batterie da ??A. L'autonomia di Spykee dovrebbe essere superiore, così come il tempo di ricarica.
Se dovesse essere necessario sostituirle nuovamente seguire questa procedura:
1. Rimuovere i cingoli
2. Svitare le 8 viti che chiudono la base di Spykee e separare la parte superiore (con il corpo) dalla parte inferiore della base facendo attenzione a non strappare fili della telecamera e dei led.
3. Rimuovere il circuito stampato (4 viti) facendo attenzione ai fili collegati ai motori.
4. Rimuovere lo sportello delle batterie (4 viti).
5. Scollegare la batteria e collegare quella nuova (attenzione alla polarità).
6. Richiudere